PlatformIO を使用した STM32 のデバッグ
PlatformIO を使用して LED 点滅コードをデバッグしましょう。
STM32のデバッグ
PlatformIO を使用した STM32 のデバッグは簡単です。 ST-LINK V2 プログラマを使用して、ブレークポイントを設定し、変数を監視し、コードをステップ実行できます。
前提条件
このチュートリアルでは、次のハードウェアが使用されます。
Blackpill STM32 ボード
MCU:STM32F411CEU6 ボード: WeAct Black Pill V2.0 回路図
安価なクローン Blackpill STM32 ボードは 4 ドル以下で購入できます。他の STM32 ボードを使用することもできますが、platformio.ini ファイルと LED ピン番号を変更する必要があります。
ST-LINK V2 プログラマー
これは、ファームウェアをボードにアップロードし、コードをデバッグするために必要です。 安価なクローン ST-LINK V2 は 5 ドル以下で購入できます。
インストール
VScode と PlatformIO
PlatformIO は、VSCode 拡張機能マーケットプレイスからインストールできます。
STM32CubeProgrammer
これはファームウェアをボードにフラッシュするために必要です。
クローンを作成 リポジトリ
git clone --branch blackpill-led-blink-arduino https://github.com/yuichiroaoki/stm32-tutorial.git
cd stm32-tutorial
クイックスタート
-
Blackpill STM32 ボードを ST-LINK V2 プログラマに接続します。
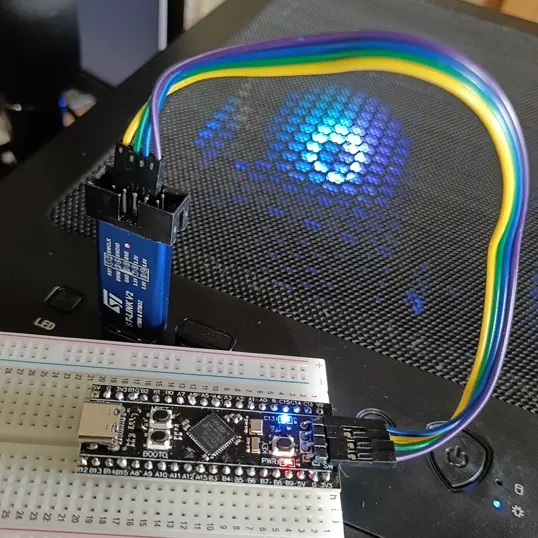
Connect the ST-LINK V2 programmer to the Blackpill STM32 board as shown in the image above. -
ST-LINK V2 プログラマをコンピュータに接続します。
-
VSCode でプロジェクト フォルダーを開きます。
-
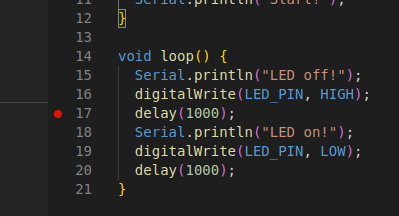
main.cppを開き、任意の行番号をクリックしてブレークポイントを設定します。You can stop the program execution at the breakpoint and check the variable values.
-
左側のサイドバーの
Run and Debugをクリックし、Start Debuggingボタンをクリックしてデバッグを開始します。The program execution will stop at the breakpoint, and you can check the variable values. For example,
SystemCoreClockis a variable that stores the system clock frequency. In the image below, the system clock frequency is 96 MHz.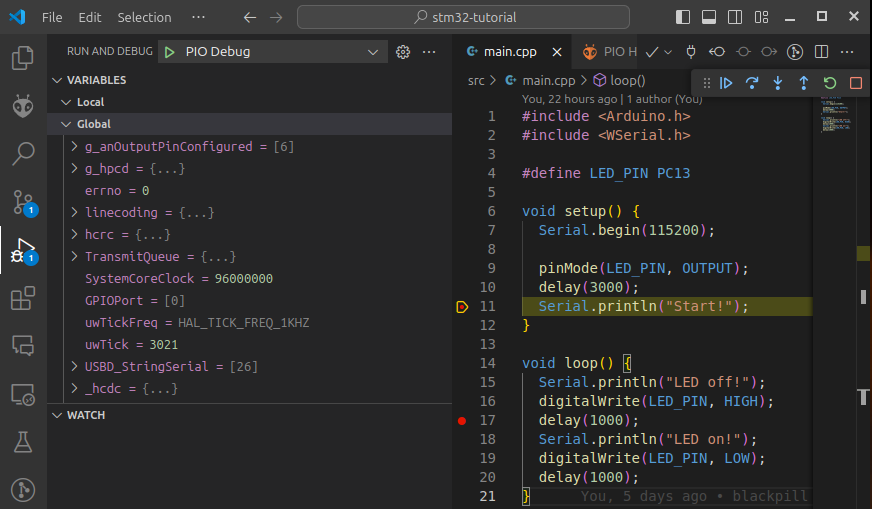
このチュートリアルでは、Arduino フレームワークを使用して、PlatformIO で STM32 ボードをデバッグしました。ただし、STM32Cube を使用してデバッグすることもできます。