Quickstart
Prerequisites
- Miniconda: Download and install Miniconda for your operating system.
Installation
-
Clone the
Winderrepository:git clone https://github.com/aotenjo-xyz/winder.gitcd winder -
Create a new conda environment and install the required dependencies:
conda env create -f environment.yml -
Activate the conda environment and set the
PYTHONPATHenvironment variable to the current directory:conda activate windingexport PYTHONPATH=$PWD -
Create a settings file Copy
settings.yml.exampletosettings.yml.cp settings-example.yml settings.yml
Power on the machine
Turn on your winding machine and connect it to your computer.
All motors will automatically run their calibration routine and move to their zero positions.
Move the motors with calib.py
Run the calibration script to move the motors:
python scripts/calib.py
In the calibration console, you can manually move each motor by entering the motor number followed by the target position.
For example:
- Enter
01to move M0 to position 1.0 - Enter
2-0.4to move M2 to position –0.4

Check the motor direction
Depending on the magnet orientation on each motor shaft, the reported angle may be reversed.
Before calibrating parameters, verify the motor direction and set the direction value for each motor in settings.yml accordingly.
-
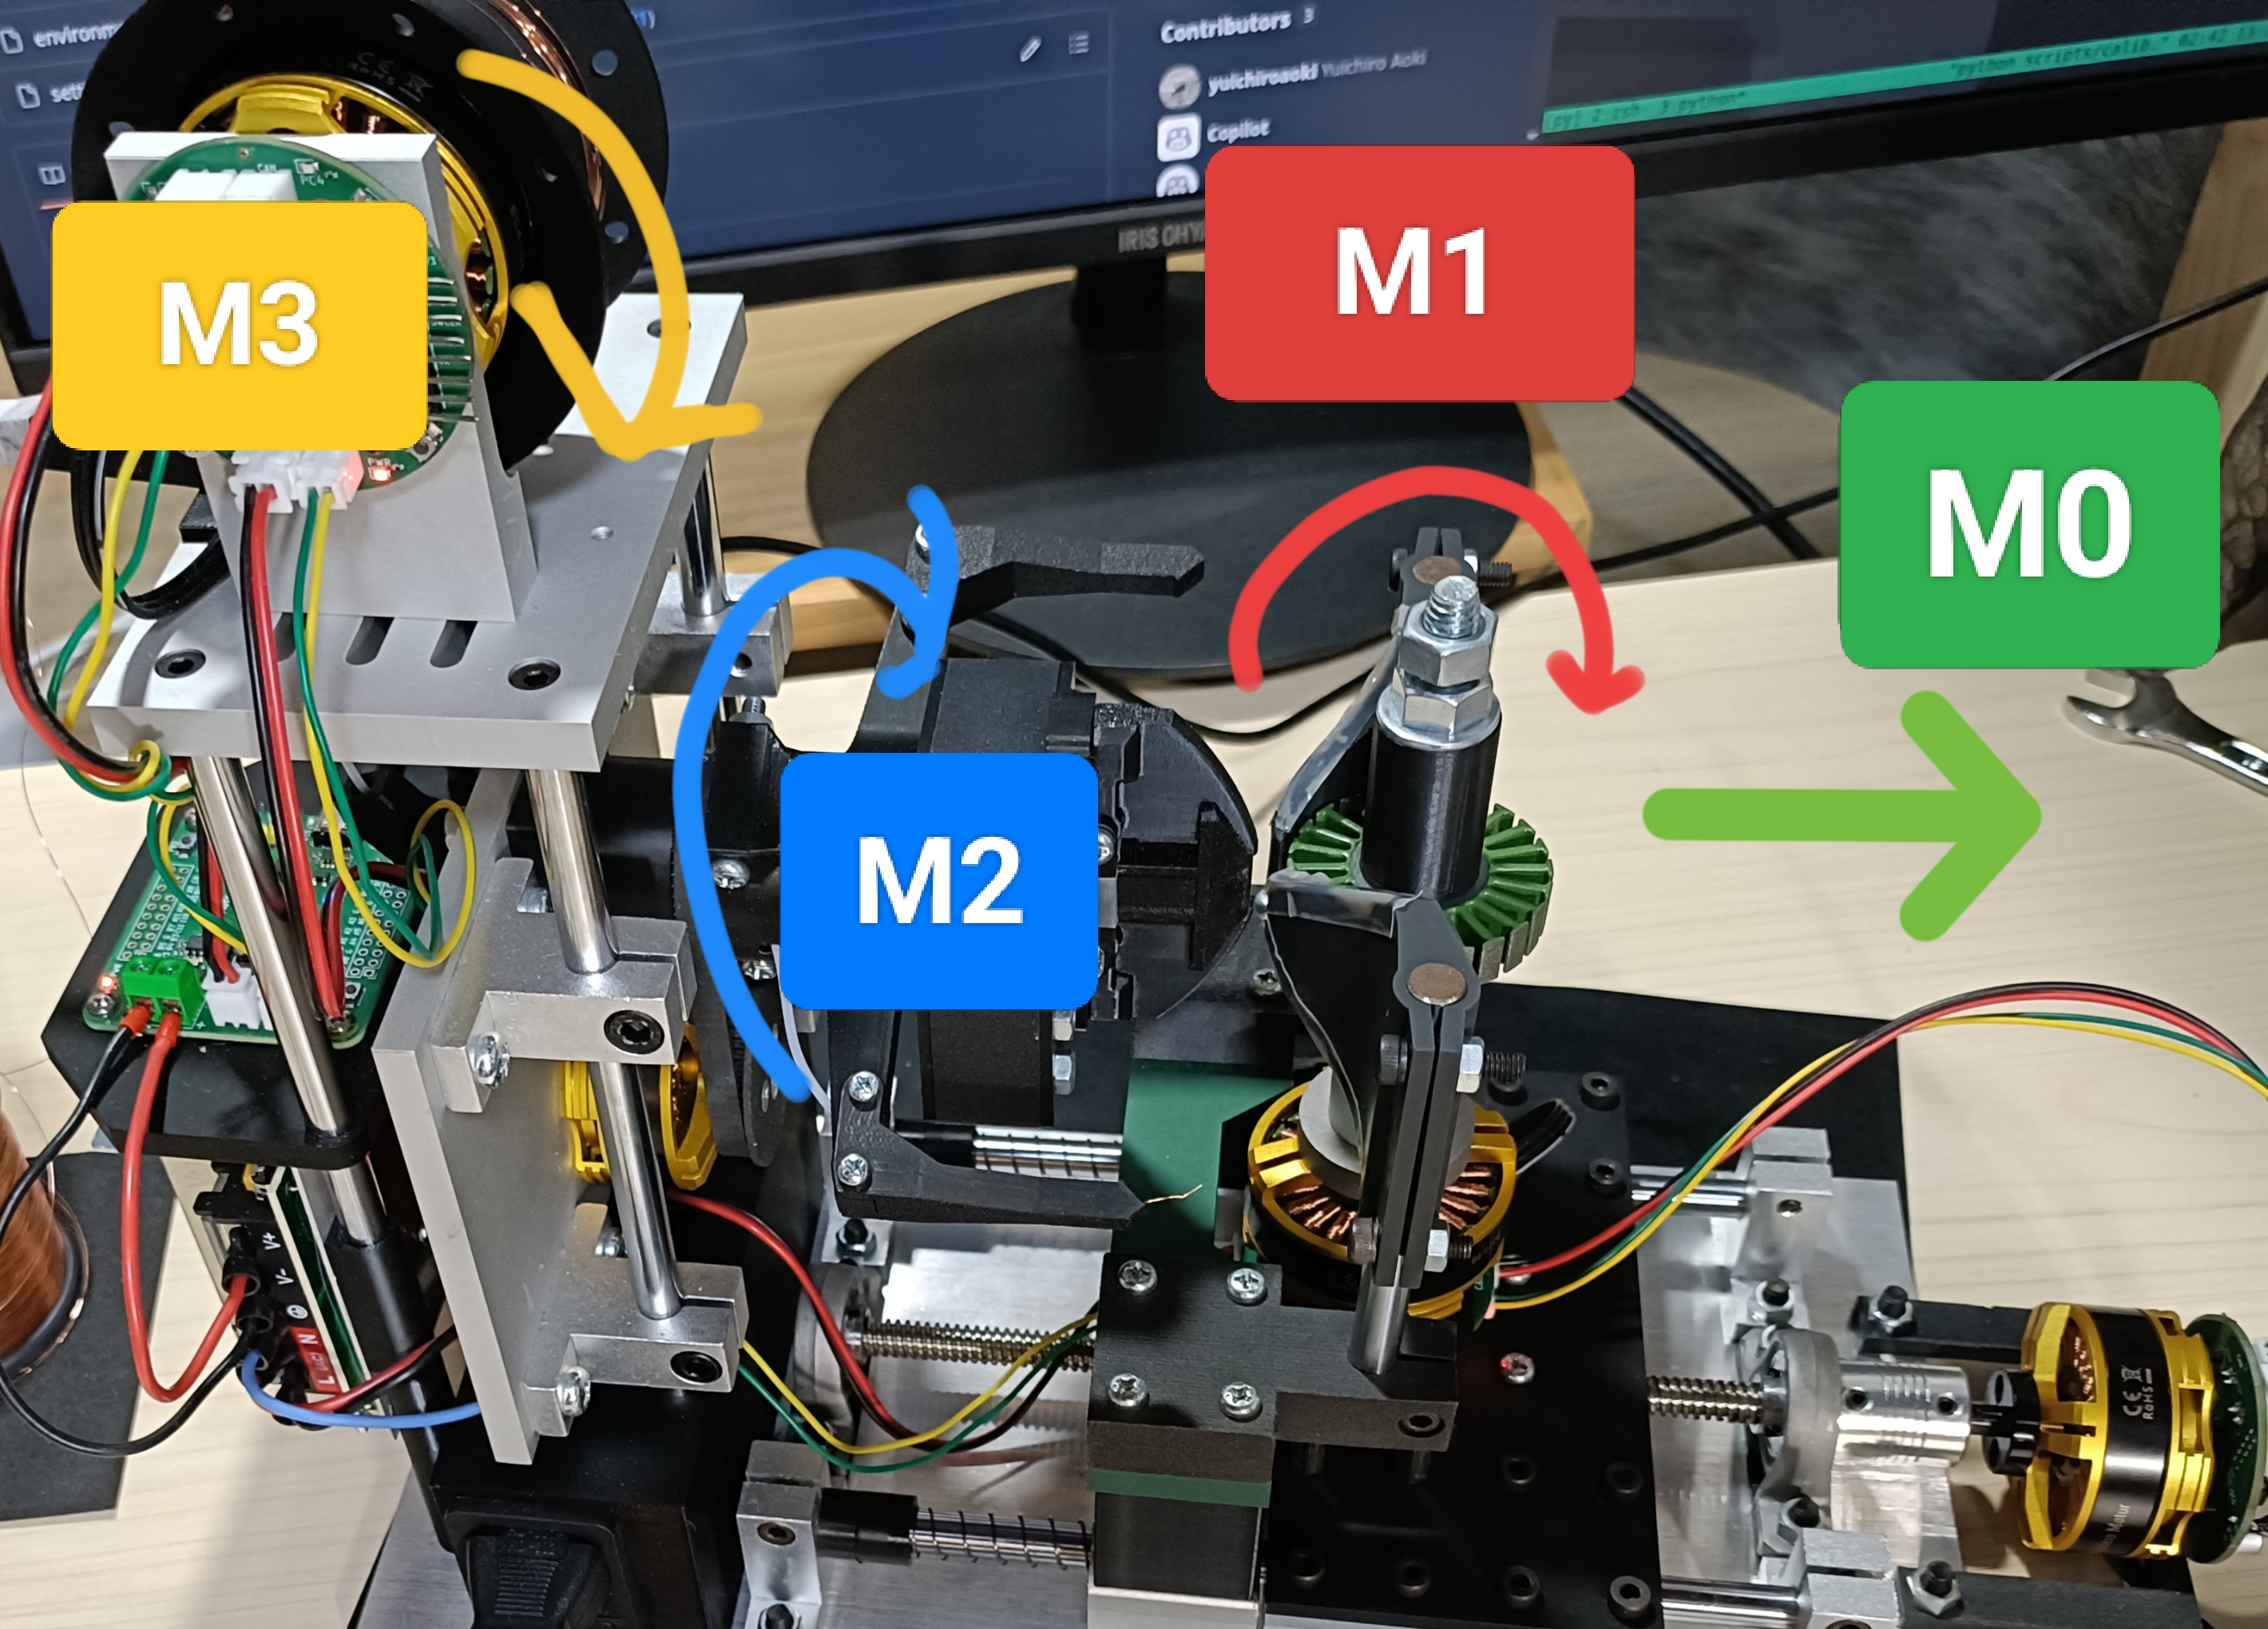
Check M0 direction:
Move M0 from 0 to 1.0 usingcalib.py.- If the M0 unit moves in the same direction as the green arrow in the image, set
direction: true. - If it moves in the opposite direction, set
direction: false.
- If the M0 unit moves in the same direction as the green arrow in the image, set
-
Check M1 and M2 direction:
Move M1 and M2 from 0 to 1.0 usingcalib.py.- If the M1 and M2 units move in the same direction as the arrows in the image, set
direction: true. - If they move in the opposite direction, set
direction: false.
- If the M1 and M2 units move in the same direction as the arrows in the image, set
-
Check M3 direction:
Hold the M3 motor firmly, then apply a small voltage (0 → 0.05).- If the spool rotates in the same direction as the image, set
direction: true. - If it rotates opposite, set
direction: false.
- If the spool rotates in the same direction as the image, set
Calibrate the parameters
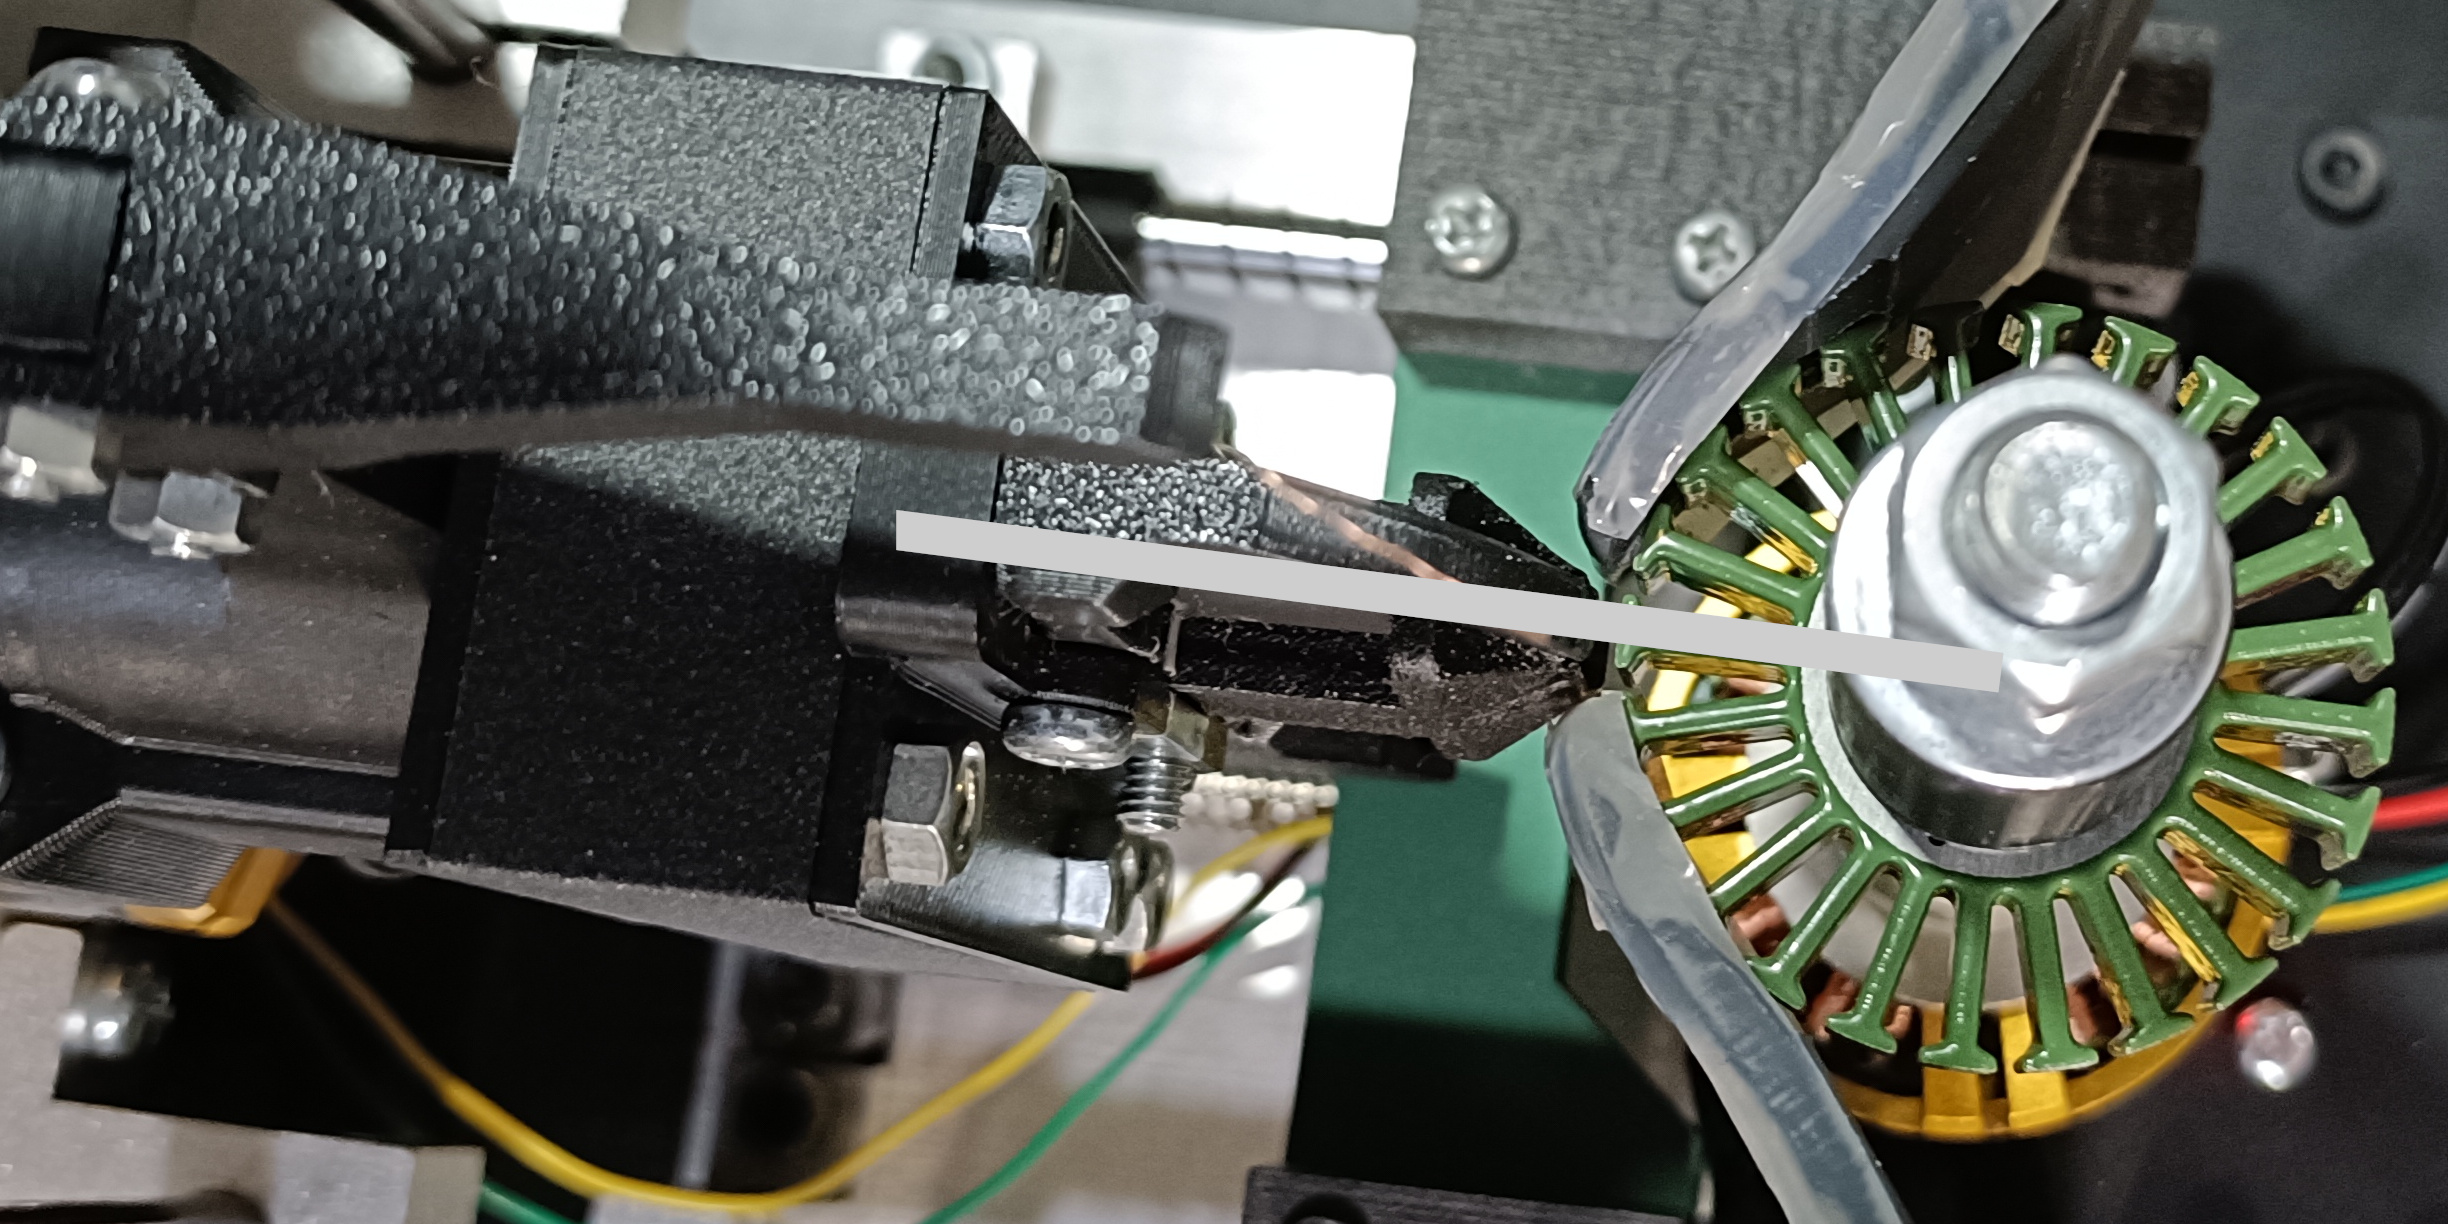
M2 Calibration
Find the M2 position when the winding arm is exactly at the 12 o’clock position (as shown below).
Set this value as the zero parameter for M2 in settings.yml.

M1 Calibration
Find the M1 position where the stator is perfectly aligned with the stator holder (see image).
Set this value as the zero parameter for M1 in settings.yml.
The machine always starts winding from the aligned tooth, so choose the tooth you want to wind first, align it with the holder, and use that position as the M1 zero.
M0 Calibration
wind_range_end
-
Move M1 to its
zeroposition. -
Move M0 until the stator holder just touches the tip of the first tooth (see image). Set this position as
wind_range_endfor M0 insettings.yml.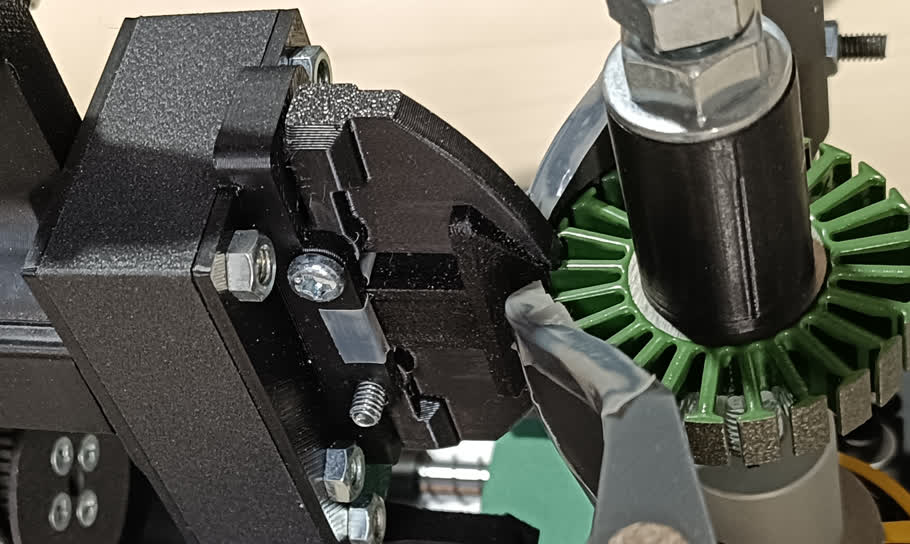
wind_range_start
-
Keep moving the M0 motor all the way (as shown below). Set this position as the
wind_range_startparameter for M0 insettings.yml.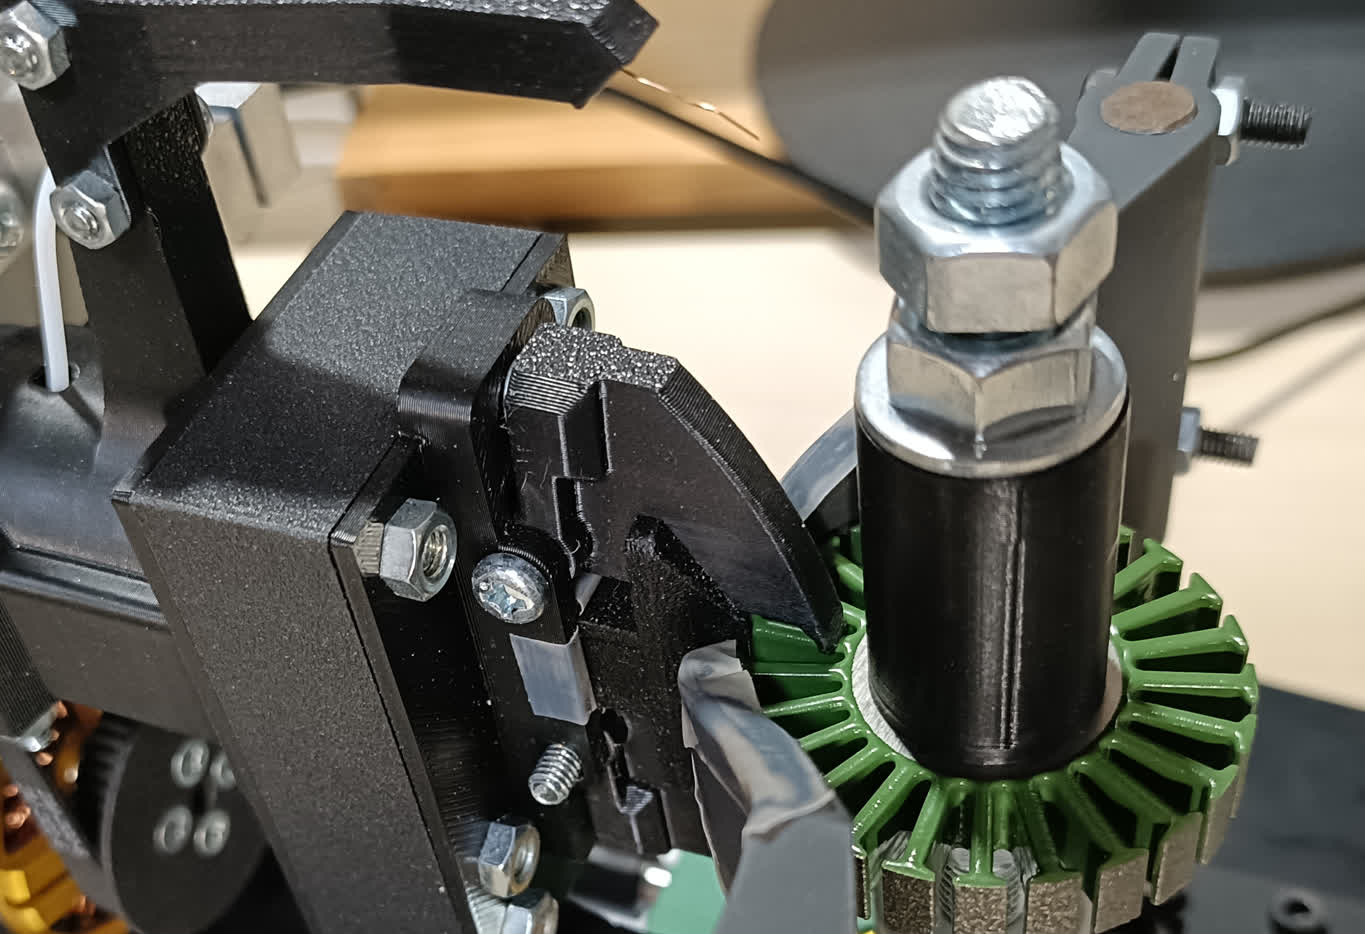
Change the winding configuration
turns
Set the number of turns as turns in settings.yml.
winding_config
Change winding_config to match your motor’s winding configuration. For more about the winding configuration, see Winding Configuration.
Run the winding script
-
After completing calibration, run the winding script:
python scripts/main.py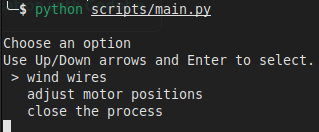
-
Select
adjust motor positions->Initialize the motor positionsto move the motors to their starting positions. -
Go back to the main menu and select
wire wires->wind wire 0to start the winding process.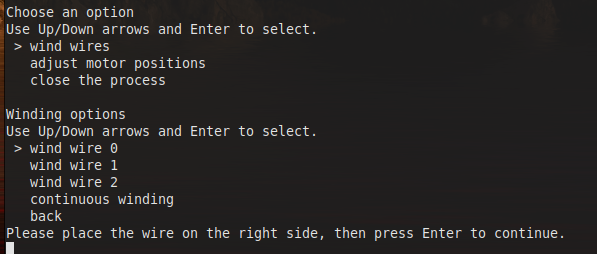
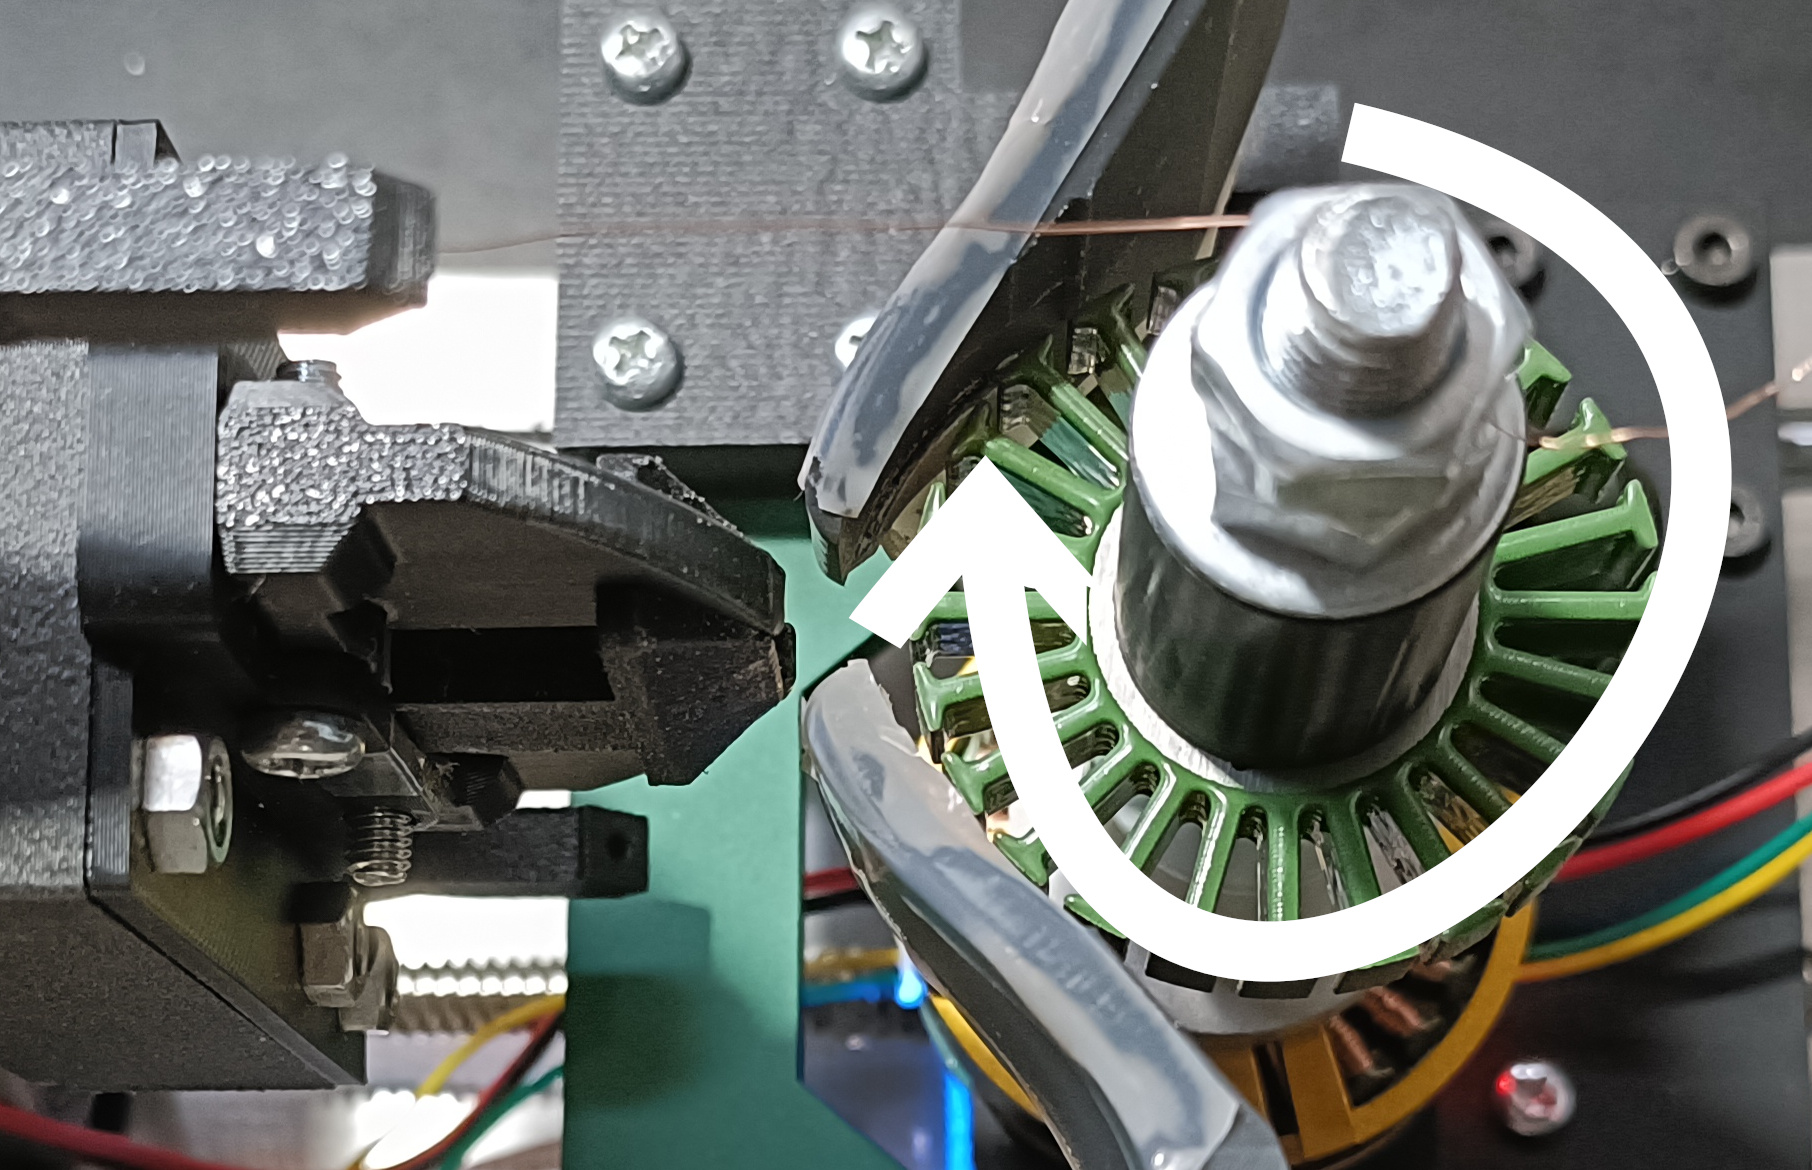
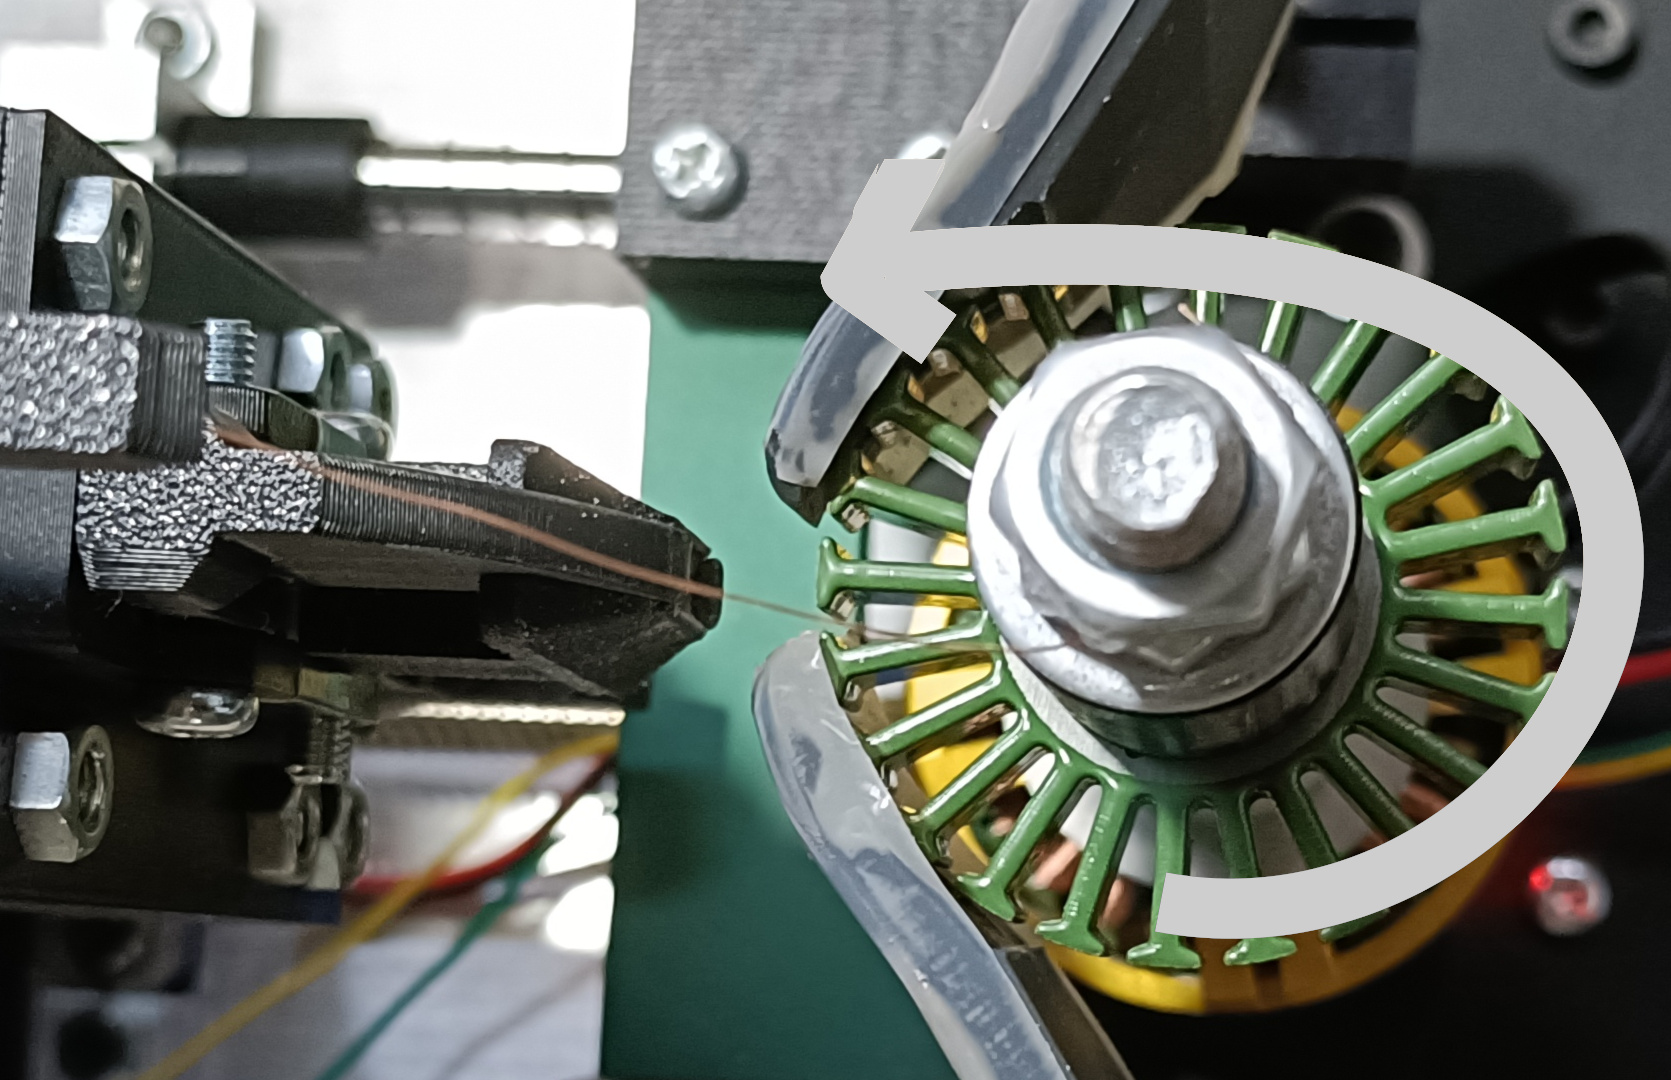
-
Tighten the nut at the top and secure the wire as instructed.
If the prompt says "Please place the wire on the right side...", place the wire as shown below and press Enter.
If the prompt says "Please place the wire on the left side...", place the wire as shown below and press Enter.
-
Hit Enter to start winding. The machine will automatically wind the wire according to the parameters you set.
