使用 STM32Cube 框架的 LED 闪烁
让我们使用 STM32Cube 框架让 Blackpill STM32 板上的 LED 闪烁。
STM32Cube框架
借助 STM32Cube 框架,您可以发挥 STM32 微控制器的全部功能。 STM32Cube 框架提供对 STM32 硬件的低级访问,使您能够编写更高效且针对性能进行优化的代码。
先决条件
在本教程中,使用以下硬件:
Blackpill STM32 板
单片机:STM32F411CEU6 主板:WeAct Black Pill V2.0 示意图
您可以以低于 4 美元的价格购买廉价的 Blackpill STM32 克隆板。您可以使用其他STM32板,但需要修改platformio.ini文件和LED引脚数。
ST-LINK V2编程器
您需要它来将固件上传到主板。您可以以低于 5 美元的价格购买廉价的 ST-LINK V2 克隆版。
安装
VScode 与 PlatformIO
您可以从 VSCode 扩展市场安装 PlatformIO。
STM32CubeProgrammer
您需要它来将固件刷新到主板上。
STM32CubeMX
该工具允许您配置 STM32 微控制器并为您的项目生成初始化代码。
克隆存储库
git clone --branch blackpill-led-blink-stm32cube https://github.com/yuichiroaoki/stm32-tutorial.git
cd stm32-tutorial
快速入门
-
将 Blackpill STM32 板连接到 ST-LINK V2 编程器。
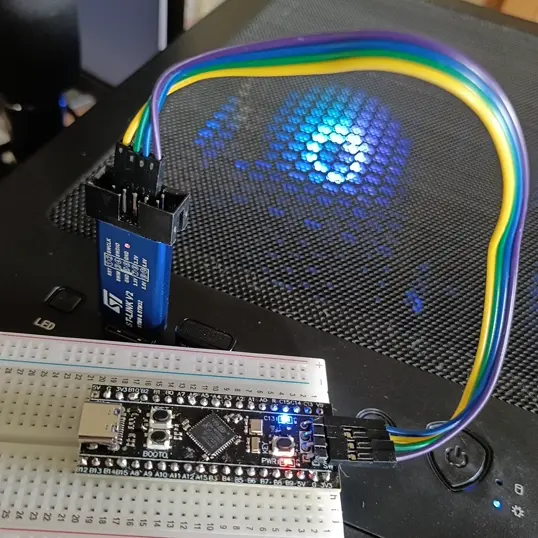
Connect the ST-LINK V2 programmer to the Blackpill STM32 board as shown in the image above. -
将 ST-LINK V2 编程器连接到计算机。
-
在 VSCode 中打开项目文件夹。
-
单击左侧栏上的 PlatformIO 选项卡,然后单击
Upload按钮将固件上传到开发板。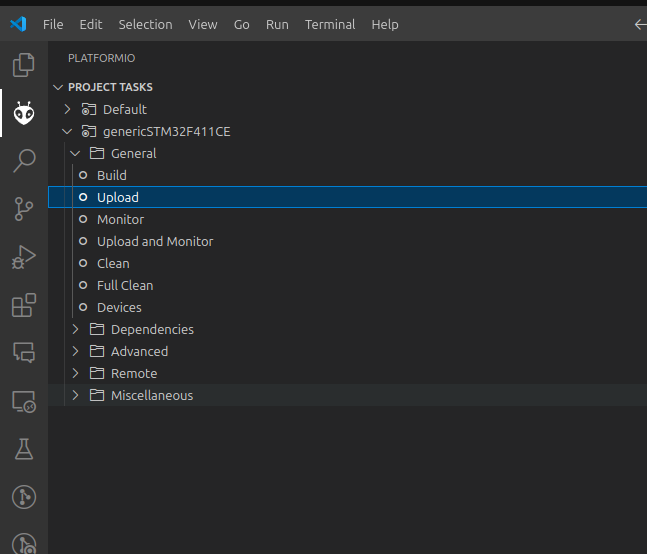
现在您应该看到 Blackpill STM32 板上的 LED 闪烁。
使用 STM32CubeMX 生成初始代码
使用STM32CubeMX,您可以配置STM32微控制器并为您的项目生成初始化代码,例如GPIO配置、时钟配置等。
-
打开STM32CubeMX并创建一个新项目。
-
选择STM32F411CE微控制器。
-
单击侧栏中的
SYS,然后在“调试”下拉菜单中选择Serial Wire。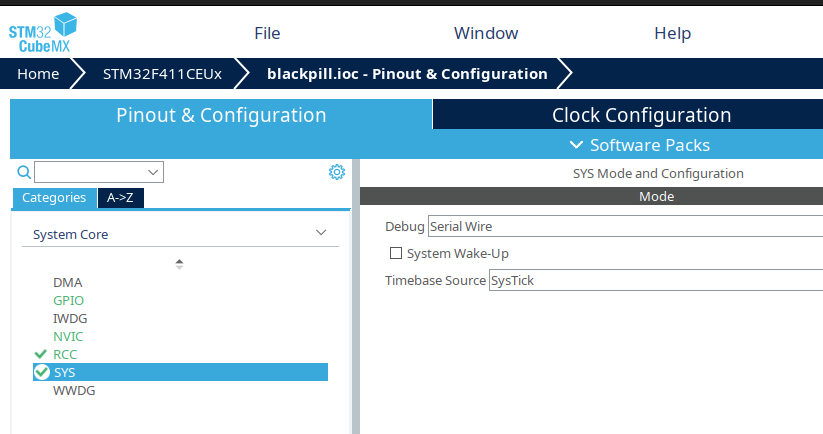 信息
信息This is important because without this setting, you won't be able to upload the firmware to the board.
-
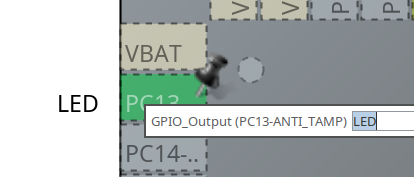
单击引脚分配和配置选项卡中的 LED 引脚,然后在模式下拉菜单中选择
GPIO_Output。For the Blackpill STM32 board, the LED pin is
PC13. You should change the pin according to your board.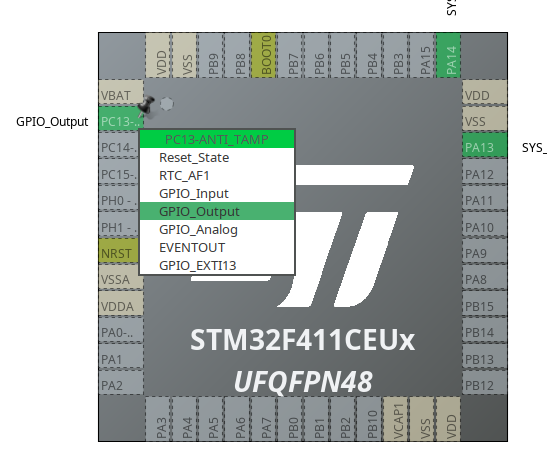
-
右键单击 LED 引脚并选择
Enter User Label并将该引脚命名为LED。提示This is useful because you can refer to the pin by name in your code.
-
单击侧栏中的
RCC,然后在高速时钟 (HSE) 下拉菜单中选择Crystal/Ceramic Resonator。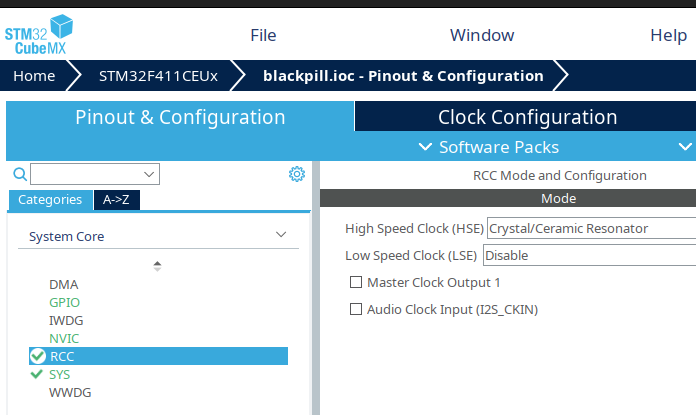
-
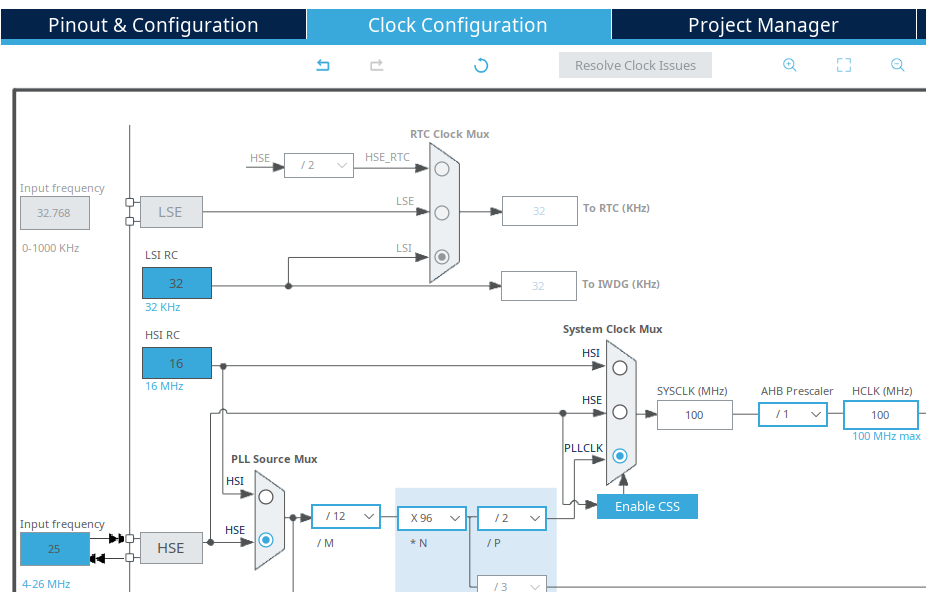
单击
Clock Configuration选项卡并配置时钟设置,如下所示:- Input 25MHz in the HSE Value field
- Select
HSEinPLL Source MuxandPLLCLKinSystem Clock Mux - Input 100MHz in the
HCLKfield and pressEnterto calculate the values for the other fields.
备注The Blackpill STM32 board has a 25MHz crystal oscillator, so you should input 25MHz in the HSE Value field.
-
单击
Project Manager选项卡,将Toolchain Folder Location设置为要保存项目的位置,并生成代码。
现在您已经有了项目的初始化代码。
在 PlatformIO 中使用生成的代码
-
将生成的代码复制到 PlatformIO 项目文件夹中的
src文件夹中。If you use Linux or macOS, you can use the following command to copy the code:
cp -r <STM32CubeMX project folder>/Core/**/* <PlatformIO project folder>/src/ -
将以下两行添加到
main.c文件中while循环的末尾以使 LED 闪烁:main.c/* USER CODE BEGIN 3 */HAL_GPIO_TogglePin(LED_GPIO_Port, LED_Pin);HAL_Delay(1000);备注If you named the LED pin
LEDin STM32CubeMX, theLED_GPIO_PortandLED_Pinwill be defined in thegpio.hfile, so you can use them in your code. -
将以下行添加到
platformio.ini文件以使用STM32CubeMX生成的配置头文件:platformio.iniboard_build.stm32cube.custom_config_header = yes -
单击左侧栏上的 PlatformIO 选项卡,然后单击
Upload按钮将固件上传到开发板。
现在您应该看到 Blackpill STM32 板上的 LED 闪烁。